Saturday, January 29, 2011

Valentine's Day ideas

Valentine's Day is only a few weeks away so I thought I'd give you some crafty ideas to get you started, because I bet it's going to sneak up on you!

Free Download
I found this cool print&cut free download from the Got Crafts site:
http://gotcrafts.typepad.com/freebies/2010/02/free-valentines-printable-cards.html

All you do is download, print it, cut it out, adhere the two sides together, and you've got a cute lollipop holder. Embellish as you like.

Valentine's layouts
Scrapbook with your Valentine's -themed papers and embellishments. Your layout doesn't need to be about Valentine's Day itself. Do a layout about the people you love or even about the things you love!


Technique-tip: hand-cut hearts from felt!

Journaling tip: list the things you love about someone!

Design tip: Valentine's is not just for girls. Choose red&black for a layouts about boys!

Tip: cut elements from your pages to make a collage.

Valentine's papers also work great for really girly layouts!

And finally, use those leftovers to make some great handmade cards! I'd love to see your ideas and creations!

Friday, January 28, 2011

Monthly Sketch layouts- January 2011

Every month the TTT design team creates a layout using a sketch. This month we are featuring a sketch from the Got Sketch Blog by Valerie Salmon. If you have never checked out their sketches they are fabulous. Lot of inspiration on their blog including fun classes!

Got Sketch 100:

Carrie's and Chrissy's take on the sketch:


Anna's and Nathalie's take on the sketch:

Monday, January 24, 2011

Janaury 2011 TTT Kit Designs- Kit #1

It's time to reveal the design teams creations with the fabulous TTT January kits. This month kit #1 featured a great new winter line by Crate paper. This kit is packed full of goodies including sparkly Ki memories words, glitter letters, matching chipboard, Jillibean soup push pins and MORE!!

Check out Chrissy's creations including this great altered paper clip:


And Carrie's creations:


Janaury 2011 TTT Kit Designs- Kit #2

It's time to reveal the design teams creations with the fabulous TTT January kits. This month kit #2 featured a great winter line by Fancy Pants called Hot Chocolate. When you see the colors of this kit it will just make you want to throw on your jammies, grab a cup of hot chocolate and get scrapping. This kit is also packed full of snowflake rubons, snowflake chipboard pieces and die cut matching chipboard with the cutest little snowman.

Check out Nathalie's Creations:


Janaury 2011 TTT Kit Designs- Kit #3

It's time to reveal the design teams creations with the fabulous TTT January kits. This month kit #3 featured a great new line by Glitz designs called Hoopla. It is a fabulous color scheme with bright teals and greens. This line could go anyway from parties, to girly, to boyish, to winter. I love all the great extras too including Kaiser craft rubons, bling, and fun new looking glass embellishments.

Check out Anna's Creations:


Friday, January 21, 2011

Include artwork on your layouts!

My daughter is old enough now that she loves to draw little pictures and hang them around the house. I wanted to think of a way to preserve them without throwing them in a container to save for her when she grows up. I also wanted to display them for everyone to enjoy. So, I decided to start including her artwork on my layouts. Why not? There's no rule that you can only scrap photographs!

Here are some examples:

Here is a layout of her sleeping with her kitties. In the top left corner is a picture she drew of her favorite kitty!
Here is a picture of the first snowman she ever drew!
Here is a layout with a picture she drew of our family:
I have several other pictures ready to be used including a princess she drew from our trip to Disney and a picture she drew of her little brother in my tummy! I also included a tree she painted in a layout I created with the TTT January kit #1. You can see it on the reveal day.

So, the next time someone draws you a picture, save it and create a layout around it!

TTT is on Facebook

This year we finally joined in and added ourselves to Facebook. So get your friends and come join us on there (we know you are on there already, right??) There will be more contests, prizes and reveals on there every month so make sure to stop by often and see what we are up to and tell us what you are up to too!

To like our page and become a fan click on the facebook box in the sidebar.


To go to our page now click here

Monday, January 10, 2011

Thank you cards with TTT bracket blocks

by Nathalie

Have you been spoiled during the Holidays? Then, you probably need to send a few Thank you cards! (~ and if you haven't been spoiled maybe it's because you didn't send any thank-yous last year! :D just kidding!).
Here are a couple of examples I created using the TTT Thank you Bracket blocks that are available in the store (8 for $2.65). They are loosely based on the pagemaps sketch below (rotated to fit the bracket block):

Bonus: All I used was scraps from past TTT kits and a few extra embellishments!


I hope to have inspired you to give the TTT brackets a try for your card making!

Thursday, January 6, 2011

Star desktop calendar tutorial


For the past couple of years I have been making calendars for my parents and grandparents using photos of the past year. This year, I came up with this one:

Supplies:
2 sheets of cardstock of the same color
various patterned papers (not too dark since we are going to print on them)
temporary adhesive
12 photos cropped to 2.5X3"
17" of ribbon
embellishments of your choice

- Cut your cardstock in 6X12" strips. You will only need three of them.
- Score each one every three inches and fold in an accordion.
- Glue back to back as shown here by the red arrows:

- Cut 14 pieces of patterned papers to roughly 3.5X6 (don't worry about being exact as we will trim them later)
- Download the free 2011 CD calendar template found here (the first one, not the quarters one):

- Print one of the pages (anyone):
- Place onto your print, two pieces of your patterned paper positioned so that the calendar part will get printed on the bottom. Attach with temporary adhesive, double sided tape, or since that was all I had, masking tape!
- Put you sheet back into your printer to print onto your patterned paper:
- Repeat the same thing for each month (=6 printouts)

- Now, all you have to do is assemble! Crop your printed patterned papers to 2 7/8"x 5 7/8" (I decided to crop my patterned papers to size after printing them just so I could center the print better).
- Attach photos and embellish as you wish.
- Last, for the cover and back page, adhere the ribbon (with the calendar closed) and glue your remainding two cropped pieces of patterned paper on top of it so that it is completely secured.
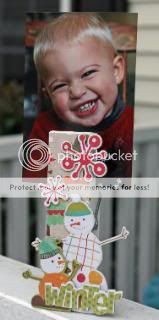
- Decorate your cover.


Note: If you are gifting this calendar, feel free to add on the back page the little illustration below with the following explanation:
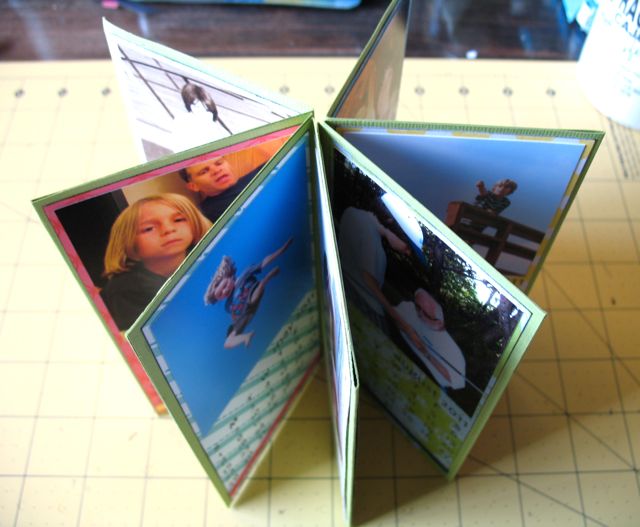
Open the knot, place the front and back pages together and tie the ribbon to display your star shaped calendar:


And you are done! I hope that you will give this fun project a go! Share yours with us if you do!

Tuesday, January 4, 2011

2010 Favorites from the Design Team

by Nathalie

Happy New Year to all the TTT fans out there! I hope you had wonderful and relaxing holidays. For my first blog post of the year, I have actually asked each Design Team member to look back and to share with us their favorite layouts or projects from 2010.
All I can say is that I am very proud to be on the same team with these talented ladies! Check out their awesome picks:

Chrissy's favorites for 2010 are:


Carrie's favorites for 2010 are:


Anna's (our newest Design Team member) favorites for 2010 are:


Aren't they fabulous?!!! I LOVE them all!

and my favorite projects for 2010 are:


It's really fun to look back, try it and share with us some of YOUR favorites! We would love to see them! Cheers!