I would just love to share with you a few of the layouts entered in TTT's various monthly contests for this month's edition of What A Catch. TTT kit customers really do make spectacular layouts and projects!
Sassy & Sweet by Taryn S-
I love the photos and how well they match the paper. I love the chipboard flowers and the handwritten journaling list. Great job with this LO Taryn!
Christmas by Prittb-
I love the arrangement of the multiple photos within the circle and I love the simple design and paper choice. Great job!
The Bird by MamaMcDonald-
I love the use of multi photos and the layering in the middle. I also love the scattered chipboard as it adds so much dimension. Great page!
Wednesday, January 27, 2010
Thursday, January 21, 2010
Simple patterned paper flowers
by Nathalie
Following a few requests, I thought I would share with you how I made the flowers on my Christmas photo wreath below. They can be used for many different projects, pages or cards.
All you need is a piece of patterned paper, a tiny piece of scrap, scissors, glue and a brad.
First, hand draw a leaf (or petal) on the back of your patterned paper, hand cut it and use it as a stencil to repeat the process for how ever many petals you want for your flower (odd numbers look better). For the wreath, I drew a big leaf to make the large flowers and smaller leaf to make the smaller one.
Hand cut a little circle out of your piece of scrap (it doesn't matter what you use since it won't be visible).Ink or spray if you wish and then gently fold them in half just to give them a little 3D effect. Using the small circle you cut from scrap as support, start gluing the petals. Be careful to only apply glue on one end.
Arrange the petals and finish by making a small hole for the brad. The brad will cover the part where the petals meet.
And voila!
You can click on any photo to enlarge it
Tuesday, January 19, 2010
Sketch Idea
For this month's sketch I used one from the Pagemaps site. I loved this one from the January Pagemaps newsletter. Share your take on it in the TTT Message Board and User Gallery!
The Sketch:
My take:
The Sketch:
My take:
Thursday, January 14, 2010
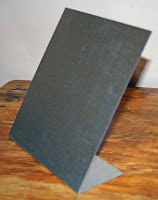
Altered Magnetic Board
This is a great project to hold pictures, lists, sketches, etc. All you need are the following supplies:
1 magnetic board (I found mine at a local craft store)
patterned paper/ cardstock
large buttons
magnets
embellishments (rub-ons)
adhesive
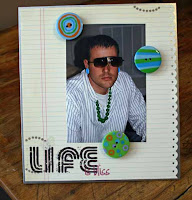
First, cut a piece of patterned paper/ cardstock to fit the front of your magnetic board. Add a decorative touch by using a border punch on one side. Adhere the paper to the front of the board.
Next, add rub-ons or other embellishments to your paper for a personal touch. I added rub-ons from a left over TTT kit!
Next, adhere small magnets to the back of large buttons or other large embellishments.
That's all!! Now add a picture, a sketch you are using for a current page, a to-do list, or any other item to your board. Use the large button magnets to hold it in place! Finally, display your board on your scrapbooking table!
Tuesday, January 12, 2010
January Kit #1 Layouts
January Kit #2 Layouts
January Kit #3 Layouts
Transparent Tuesday
Friday, January 1, 2010
January Monthly Kit Contest
by Nathalie
Happy New Year TTT kit fans!
1/ During the cold winter months, a blue and sunny sky is always a mood lifter
2/ All three January kits have it in them
and 3/ My first two January DT pages happen to match the requirement for this contest!
Did you figure it out yet? For this month's contest, make a page with a blue background with any Transparent Touches kit . It can be cardstock or patterned paper but the background has to be blue (any shade) and you have to use one of TTT's kits (old or new).
Please refer to the rules HERE for additional details. Due date this month will be midnight PST on Sunday January 31st. Winner will be determined by drawing. You can enter as many times as you like. 2 page LOs count as one entry.
You can post your pages in this thread to share but in order to be in the contest you must post your pages in the gallery under the "January 2010 Contest Work Gallery" (I know that some of you have been having trouble with the Gallery so we will take that into account until it is resolved).
Have fun!!! Can't wait to see your pages!
Subscribe to:
Posts (Atom)