So you have all day to scrap but you still have to get supper on the table! Well, here is a great recipe that cooks all day in the crock pot and is hot and ready to serve at dinner time.
Combine the following in a crock pot:
1 large chopped onion
16 oz black beans- drained
16 oz kidney beans
1 can whole kernel corn- drained
8 oz tomato sauce
14.5 oz Rotell tomatoes (Rotell is the name brand)
28 oz diced tomatoes
1 package taco seasoning
2 chicken breast- uncooked
cook on low for 6-8 hours or on high 3-4 hours
Top with shredded cheese, tostitos, sour cream, etc.
ENJOY and happy scrapping!
Saturday, July 31, 2010
Thursday, July 29, 2010
October Afternoon Mini Album
October Afternoon is one of my favorite manufacturers. When I saw the Fly A Kite Flashcard Book I just had to have it and turn it into a mini album for our annual summer vacation. I also fell in love with Transparent Touches & Tags May Kit #3 which included the the Fly A Kite collection and had to get it!!! I was also able to use up some of my summer scrapbook stash to complete the pages with fun embellishments.
Here is my mini album. Hope it inspires you to create one as well : )
Here is the cover:

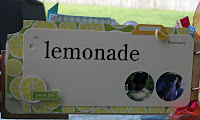
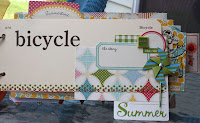
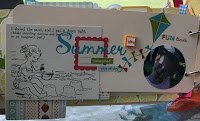

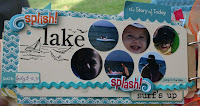
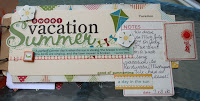
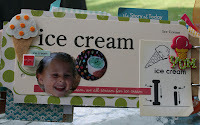
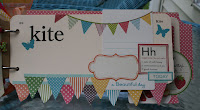
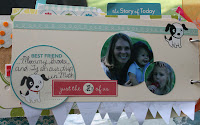
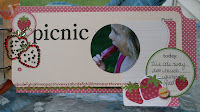
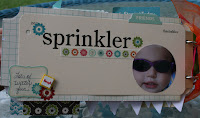
Here is my mini album. Hope it inspires you to create one as well : )
Here is the cover:


Wednesday, July 28, 2010
Paper Piecing from the Internet
Have you ever had trouble finding the perfect embellishment for you page? Well, look no further than your computer. There are several sites that offer free clip art and free coloring pages. All you have to do is search for the image you need, print it on carstock/patterned paper, cut it out, and piece it back together.
For this layout I wanted to add a picture of a cantaloupe. Since I don't have a cantaloupe embellishment in my scrap pile, I decided to find one online to print for my page. Once I found the image I printed it on three separate pieces of scrap paper: orange, dk. green, and light green. Once I printed it, I cut out the separate pieces and pieced them back together to create my embellishment.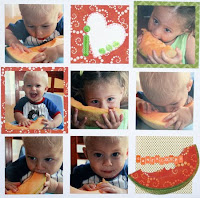
So, the next time you can't find the perfect embellishment, Google it!! It also a great way to use up your scrap stash!
For this layout I wanted to add a picture of a cantaloupe. Since I don't have a cantaloupe embellishment in my scrap pile, I decided to find one online to print for my page. Once I found the image I printed it on three separate pieces of scrap paper: orange, dk. green, and light green. Once I printed it, I cut out the separate pieces and pieced them back together to create my embellishment.

So, the next time you can't find the perfect embellishment, Google it!! It also a great way to use up your scrap stash!
Friday, July 23, 2010
Weekly Sketch
As you probably know I LOVE SKETCHES!!! Here's a new sketch I made just for you this week featuring a 5x7 and a cropped 4x6. Of course you could use any two photo combination or just the 5x7 would be cute too! We would love to see your creations using the sketch in the TTT Gallery! Happy Scrapping and Happy Weekend!
The sketch:

My example:
 Don't forget only 1 more week to enter the TTT monthly contests! Check them out here on the blog or the Message Board.
The sketch:

My example:
 Don't forget only 1 more week to enter the TTT monthly contests! Check them out here on the blog or the Message Board.
Wednesday, July 21, 2010
Scrap Scrap Happy!
Here are 2 fun ways to use up your scraps. If you are like me and used up almost every last but of the July Kit #1 with the new Echo Park paper but still have a few little pieces left......and can't bear to throw them away then this post if for you!
Idea #1: Weave Scrap strips together (weave strips together glueing as you go, then cut to side and glue to project with a liquid glue.)

Idea#2: Punch 1.5" circles (cover project in patterned paper circles and embellish)

Idea #1: Weave Scrap strips together (weave strips together glueing as you go, then cut to side and glue to project with a liquid glue.)

Idea#2: Punch 1.5" circles (cover project in patterned paper circles and embellish)

Monday, July 19, 2010
Project-Coaster Mini How to's
This month the July Kit #3 features a fun Maya Road chipboard coaster album. I thought it would be fun to show you how I like to create mine. I choose to use a coffee cup album that I already had and some Basic Grey paper (mainly because I wiped out my July kit creating layouts!) If you are looking for a quick fun project or need a little gift for someone then this is the perfect idea and can be completed in an hour or two.
Supply list: All you need is a few simple supplies)
Only 3 more months until the TTT cruise departs. Make sure to sign up now before you miss out on the FUN! TTT has now teamed up with Embellish it. See side bar for more information!
Supply list: All you need is a few simple supplies)
- Coordinating Patterned Paper
- Die cuts and tags
- Floss and/or ribbon
- Chipboard shapes
- Sheet of rubons
- Matching Letter stickers for title
- Adhesive, Exacto Knife, and ink
- Adhere all your shapes to the sheets of patterned paper. Cut out with your exacto knife and then repeat with the other sides. Ink all edges.

- Adhere small rectangles of cardstock to each piece besides the front cover. The blocks will serve as photo mats later on when you want to add photos. I used 2x3" mats.

- Next create your cover. I added a small oval of brown paper to give my cup book the look of a coffee cup. Then I added matching letter stickers in 2 different colors for a title. I used diamond glaze on the brown letters and pink stickles on the pink letters to give them a fun look.

- Next finish off the rest of the pages by adding tags, die cuts and chipboard shapes throughout. Don't go too crazy simple is better. Next add a few rub ons here and there and make sure to tie your ribbon or floss onto your tags. And walla your done!


Only 3 more months until the TTT cruise departs. Make sure to sign up now before you miss out on the FUN! TTT has now teamed up with Embellish it. See side bar for more information!
Friday, July 16, 2010
Favorite Summery Dessert!
I loved Nathalie's idea of posting our favorite summery things to cook so I am going to keep with the trend. I love Strawberries and am always looking for new fun ways to use them. This is one of my all time favorites cause it's fast, easy, different, has a great textures and best of all they are individually sized!

Recipe: FOR SHORTCAKES
Recipe thanks to Martha Stewart
Almond-cornmeal Strawberry Shortcakes

Recipe: FOR SHORTCAKES
- 6 tablespoons butter, room temperature, plus more for tins
- 1/2 cup all-purpose flour, spooned and leveled, plus more for tins
- 3/4 cup sliced almonds
- 3/4 cup sugar
- 2 large eggs
- 1 teaspoon vanilla extract
- 1/4 teaspoon salt
- 1/2 cup yellow cornmeal
- FOR FILLING
- 1 pound strawberries
- 1/3 cup plus 1 tablespoon sugar
- 3/4 cup heavy cream
Directions
- Make shortcakes: Preheat oven to 350 degrees. Butter and flour 6 jumbo muffin tins (each 1-cup capacity); set aside.
- In a food processor, blend 1/2 cup sliced almonds with sugar until finely ground. Add butter, eggs, vanilla, and salt; process until combined, scraping down sides of bowl as necessary (mixture may appear curdled at this point). Add flour and cornmeal; pulse just until moistened.
- Divide batter evenly among prepared muffin tins; sprinkle with remaining 3/4 cup sliced almonds. Bake until golden and a toothpick inserted in centers comes out clean, 20 to 25 minutes. Cool cakes 5 minutes in pan; remove from pan, and transfer to a rack to cool completely.
- Make filling: Hull and quarter strawberries. In a medium bowl, combine with 1/3 cup sugar. Let stand until syrupy, tossing occasionally, at least 20 minutes (and up to 6 hours, covered and refrigerated).
- In another medium bowl, using an electric mixer, whip cream with remaining 1 tablespoon sugar until soft peaks form.
- With a serrated knife, split cooled shortcakes horizontally. Place bottom halves on serving plates. Dividing evenly, layer with sweetened strawberries and whipped cream; cover with shortcake tops.
Thursday, July 15, 2010
TTT August Kits!
Well, its the 15th of the month and so it is time to reveal the August kits. They are absolutely beautiful. All of the details for each of the 3 kits as well as add ons can be found on the TTT message board here: http://www.transparenttouches.com/phpBB2/viewforum.php?f=4
Kit #1- Fancy Pants Rusted Sun

Kit #2- Fancy Pants Like Father Like Son

Kit #3- Bo Bunny Paradise

*****ATTENTION KIT CUSTOMERS*****
Monica is out of town on vacation right now and without email access. Please take a look at the 3 kit choices for August and email her which one you would like. She will be going through the emails when she returns on July 19th. If you are emailing her late in the day on the 15th, or later....please also include a second choice for a kit, in case your first choice is already sold out when your email goes through. Please assume that you got the kit you wanted, unless you get an email from her letting you know it was already gone.
Kit #1- Fancy Pants Rusted Sun
Kit #2- Fancy Pants Like Father Like Son
Kit #3- Bo Bunny Paradise
*****ATTENTION KIT CUSTOMERS*****
Monica is out of town on vacation right now and without email access. Please take a look at the 3 kit choices for August and email her which one you would like. She will be going through the emails when she returns on July 19th. If you are emailing her late in the day on the 15th, or later....please also include a second choice for a kit, in case your first choice is already sold out when your email goes through. Please assume that you got the kit you wanted, unless you get an email from her letting you know it was already gone.
Wednesday, July 14, 2010
July DT Sketch Layouts
This month we used a sketch from one of my favorite sketch blogs The Scrappiest. There are lots of fun sketches and contests every month. Here is the sketch she sent us to use this month (Thanks, Liz!):
The Sketch:

Our examples:


The Sketch:
Our examples:
Tuesday, July 13, 2010
Transparent Tuesday!
Monday, July 12, 2010
Weekly Sketch
Here's a fun sketch I made for you to use up two of those 4x6's you got laying around. If you get a chance this weekend we would love to see what you do with the sketch. Have fun and Happy Scrapping!
The Sketch:

My example:
 Have fun with it and we would love to see your creations in the User gallery.
The Sketch:

My example:
 Have fun with it and we would love to see your creations in the User gallery.
Saturday, July 10, 2010
July 2010 Kit Designs- Kit #1
Subscribe to:
Comments (Atom)


