
by Chrystal Riddell
After searching and searching for the perfect organizer, I became convinced that it just didn't exist. This gave me a great excuse to be messy, but wasn't the answer. I decided to make my my own! What I really wanted was something that had not only a monthly calendar big enough to write on, but also space to add notes, papers, etc.
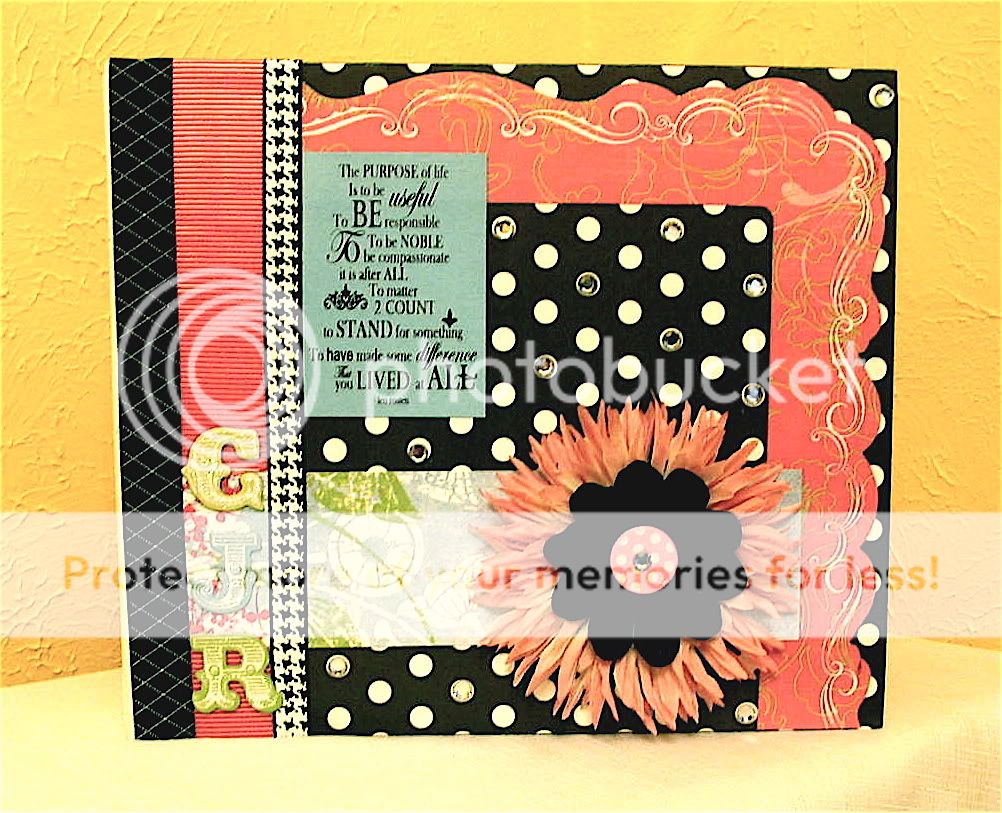
Although you could do this with anysort of ring-binder, I chose the Bo Bunny
 naked binder that comes with sturdy tabbed dividers. This organizer can be used year after year by simply printing out new calendars to fill in!
- Choose your papers. The great thing about this project is that it's all yours. You choose the paper because you LIKE it! Not because it matches pictures, kids, or holidays! Pick something you will still like it 6 months. Classic black and white is always a good bet.
- Embellish the front. When adhering the paper, Mod Podge is ideal because it seals and protects your book from dirt and grimy fingerprints. Make sureyou use MP all the way through, from the bottom to the top layer so your paper doesn't warp or wrinkle. Use heavy duty adhesives, such as Tacky Tape for ribbon and glue dots for heavy things. On my book, I used a Crop-A-Dile to punch a hole for the brad to attach the flowers. Choose a favorite quote that you love to inspire you.
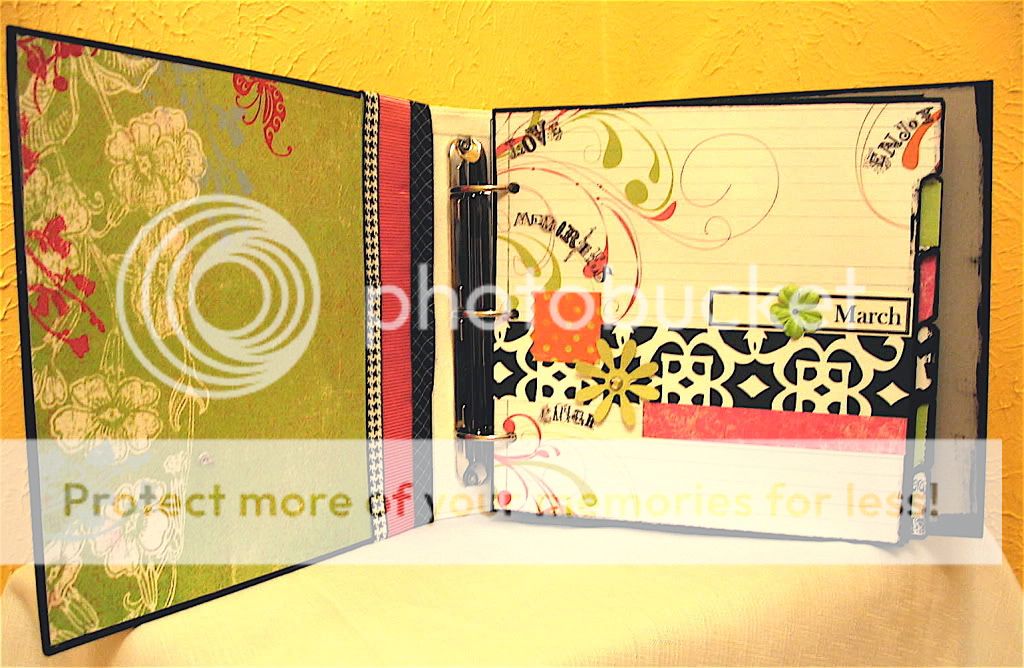
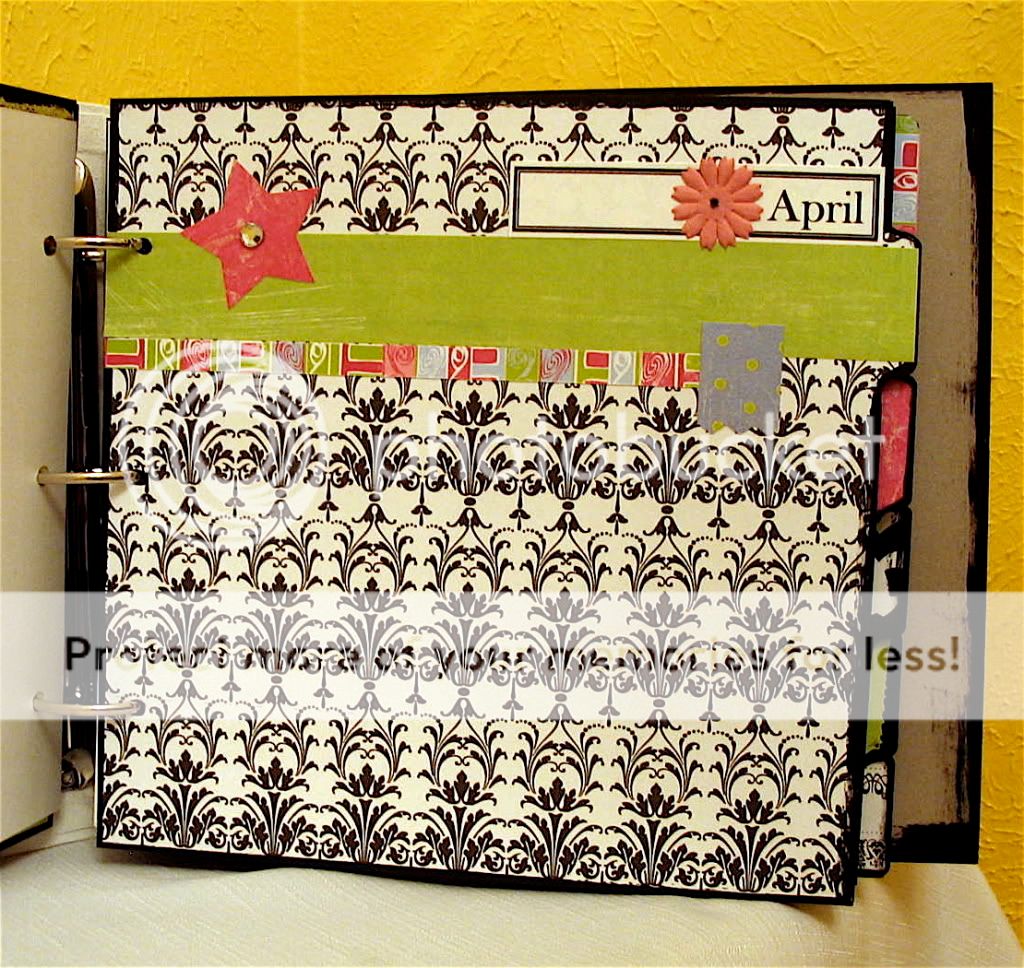
- Using one page as a template, cut all your divider papers at once. This will save time and actually help you finish the project! To stretch your supplies farther, use solid cardstock or acrylic paint for the back of the dividers. Use the scraps to create a simple, repetitive design throughout.
- Label the months on each divider. I simply printed mine out using a textbox in Word, but you could also use stamps, stickers, or rub-ons. Embellish as desired.
- Print out a calendar on cardstock for each month. Mat this on more cardstock for reinforcement, punch holes, and insert. You can find a variety of calendar templates on the internet. I used the "Calendar" option in Hotmail, which already has each month set up and numbered.

- Add whatever else works for you! Next year, take out your calendars, save them for scrapbook reference and print out 2009 calendar pages!

 SOME ADDITIONAL IDEAS:
*Punch holes in a manila envelope to save receipts.
*Create a pocket page for each child that could move from month to month to save school papers.
*Punch holes in a sports schedule.
*Add a page protector in each month for pictures or sketches you want to scrap.
*Put extra paper in each month for grocery lists.
*Keep a zippered pouch with some emergency "coffee or soda" change in it.
5 comments:
What a cute project Chrystal! I love the idea of using a 3 ring binder, the papers you chose and the "flexibility" of the whole project!
Love the manila envelopes idea and the colors are stunning!
very neat project! It could be used for a bill organizer etc too, just add some pockets!!
i love it!! thanks for sharing!
This is SO cute AND practical!!
Post a Comment