Monday, September 27, 2010

Card Making Day

October 2nd is world card making day.....yeah I didn't know that either. So dust off your card making supplies and get creative. With lots of holidays right around the corner there is all sorts of cards you could make. I choose to do some Christmas cards. Feel free to use mine as inspiration, to copy or do whatever you like. Just make sure to get some cards made this month!

Friday, September 24, 2010

Weekly Sketch

Just a fun sketch to get you going this week. Use one big photo a row of vertical photos or 4 4x6's in a row. Either way it will look great! Also don't forget to check out this months contests! Have fun!

The sketch:

My Example using the TTT September Kit #1:

Wednesday, September 22, 2010

Halloween Banner

Banners are a super fun and easy decoration to make for the Holidays. For this Halloween banner you first need to pick what you want it to say ie. Happy Halloween, Haunted House, Trick or Treat, etc. Then from there decide how many pennants you need based on the amount of letters and/or spaces. Now that we have that out of the way let's start!

Gather your supplies:
  • Patterned paper
  • Black or white cardstock
  • Cricut or Die cutting machine
  • Ribbon
  • Hole Punch
  • Embellishments
Steps:
  1. Cut out all your pennants from the patterned paper. You can do this by hand or with a shape cartridge (I used the hat blackout from Sweet treats and flipped the pieces upside down.)
  2. Cut your saying out of black cardstock with diecut machine. You could also use chipboard letters, print it and cut out or anytime type of stickers. I choose the stamped cartridge for the Cricut to cut mine.
  3. Arrange the order of your pennants alternating designs.
  4. Adhere letters. If you are using spaces then adhere an embellishment to the space pennants (like a mummy or ghost!)
  5. Embellish as desired.
  6. Punch holes in two top corners. Using strips of ribbon tie together. Add more ribbon as desired to ties. Attach twine or ribbon to the two end pieces and tie a loop at the end to hang your banner.
Show us your completed banners in the TTT Gallery! And don't forget to enter your creations in this months contests. And if you are cruising with us just a few more weeks to go, Wahoo!!! And if not sign up now!

Monday, September 20, 2010

Sept 2010 TTT Designs- Kit #1

Well, it's time to reveal the design team work for each of the three September kits. We hope you like what you see. First take a look at the designs created by Carrie and Jen with kit #3- Crate Paper Restoration (mixed with some MME).

Carrie's Designs:


Jen's Designs:

Sept 2010 TTT Designs- Kit #2

Take a look at the beautiful designs Chrissy made with TTT kit #2- Fancy Pants Happy Together.

Chrissy's Designs:


Sept 2010 TTT Designs- Kit #3

Please take a look at the amazing designs of Nathalie and Candy who got to work with TTT kit #3- My Mind's Eye- Union Square.

Nathalie's Designs:


Candy's Designs:

Saturday, September 18, 2010

Supply Jars

Here's a fun, easy way to add storage to your scrap room or as a gift to your child's teacher. All you need is:

-jars
-patterned paper
-ribbon
-stickers
-alphabet letters

To create the supply jars simply wrap paper around the jar, cut, and adhere. Decorate the paper with stickers and alphabet letters. Then, wrap a ribbon around the top. Finally, fill the jars with the supplies you labeled on each jar.

Here is an example:


I filled the jars with pens, pencils, and markers. ENJOY!

Monday, September 13, 2010

Fall Inspiration

Fall is just around the corner so I thought I'd share some fall themed layouts to get you inspired to create or shop!!!

Maybe you are going or have gone apple picking:

Maybe you have some great fall themed pictures:

Maybe you are going to the pumpkin patch:

Maybe you have a couple parties planned:

Or, maybe you have been watching your favorite team play football! (GO BLUE!!)
Whatever the occasion it's time to break out those fall papers and embellishments! Or maybe this will give you an excuse to buy some new goodies : )

Wednesday, September 8, 2010

Teacher Gifts

If you are trying to think of a wonderful teacher gift here is one for you to try. It is inexpensive and your child can add his/her own unique touch. My daughter was more than excited to make her teachers a special gift. All you need is the following:

-clipboard
-scrap paper (use some from your stash!)
-spray adhesive
-embellishments
-picture your child has drawn on cardstock
-ribbon
-modge podge

First, I took measurements for my paper. I decided on my design, cut my paper, and then adhered it to the clipboard with spray adhesive. For my daughter's own personal picture, I cut the paper to size and then asked her to draw any picture she would like before I adhered it to the clipboard. Then, I added embellishments such as stickers, ribbon, ric-rac, initial(s), etc. Finally, I went over my design with modge podge and tied a ribbon to the top.

Here are the two I made for her teachers. Her special picture is on the lower left side of the clipboard. You could make your child's picture smaller or larger.

Friday, September 3, 2010

Weekend Sketch

Another fun sketch to inspire you this weekend. Don't forget to check out our new contests this month posted on the TTT Message board and the blog!

The sketch:

My example:

Wednesday, September 1, 2010

September 2010 Contest and Challenge

Did you know that every month TTT offers both a contest and a challenge and for both you can win prizes? The contest is for past or current customers of TTT as you do need to use a TTT kit to enter. We also offer a challenge and this is open to anyone and you DO NOT need to use a TTT kit to enter. So here are the details for both this month.
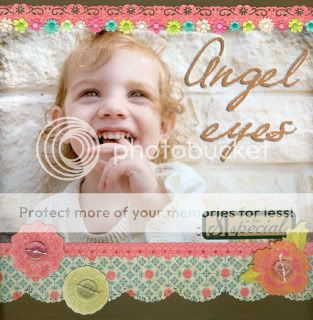
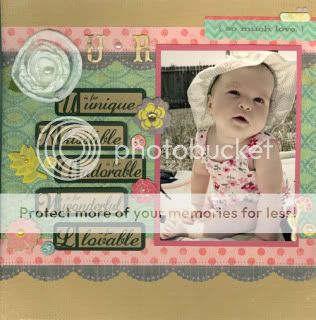
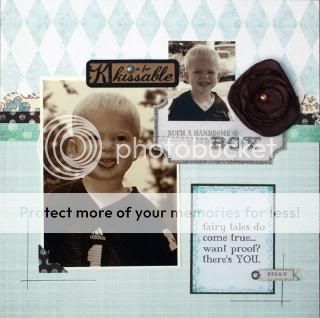
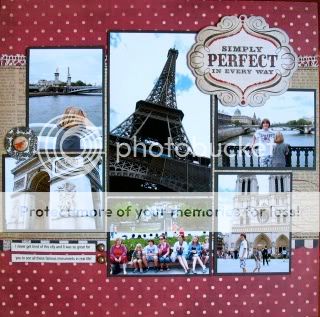
#1-September 2010 Monthly Contest:
The new Page Maps for Sept came out today and I love several of them. I picked this one so go ahead and make a page using this sketch. That is all you need to do! Please feel free to vary photo sizes...use the sketch as you see fit.

Now onto the small print:
The main requirement is that you need to use a kit from Transparent Touches, any kit.

Due date this month will be midnight PST Sept 30th. Winner will be determined by drawing.

You can enter as many times as you like. 2 page LOs count as one entry.

You can post your pages two ways: In the gallery here: http://www.transparenttouches.com/gallery/thumbnails.php?album=352 or here on the blog linking your layout entry. I look forward to seeing your entries. Feel free to share them here in this post as well.
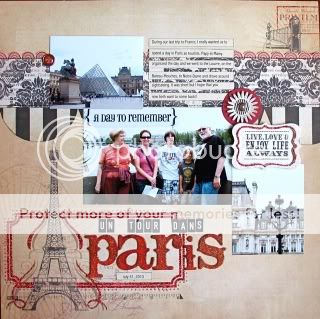
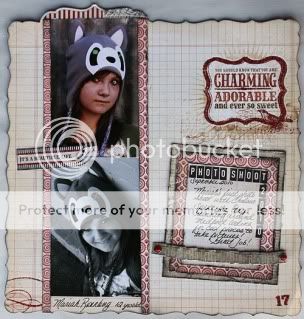
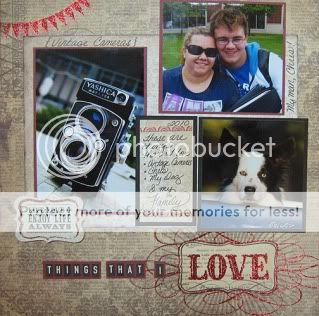
#2- September 2010 Monthly Challenge:
Well, it's back to school time. Maybe your kids or grandkids or your friend's kids or whoever went back to school in Aug or this month. So it is the perfect time to make some school pages. Use this years photos or catch up on past years' photos.

Contest Guidelines:
Please make sure to upload your entry in the Monthly Challenge Gallery-Sept folder in the TTT User Gallery or upload to the blog post regarding this contest and include a link to your entry by midnight PST on Sept 30th. The page needs to be new and created for this challenge. One winner will be drawn to win a TTT prize pack!
Anyone can participate and you can use whatever scrap materials you want to. It does not need to be created with a TTT kit.

2 page lo's count as 1 page. For this challenge and this challenge only each primary color you use is one entry into the game.

Thanks and we hope you participate.

Bo Bunny Mini Book or Photo Display

In the August Kit #3 you found instructions to make a photo and quote display. Well since I am all about the mini books I kinda followed it and kinda just ended up well..........turning it into a mini book. I thought I would post here what I did so you could follow along, get your own ideas or just simply make one of your own even if you got another kit just by mixing up the paper a bit. So to start off gather your basic materials and the kit you want to use.

Steps:
  1. They had you place each card (page) individually on the display case but instead I punched a hole at the top corner of each page and bound it together with a binder ring. You make the pages by cutting pieces of patterned paper to 4.5x6". Mine was 12 pages long but you can make yours as many as you like.
  2. Instead of adding quotes on some of the pages I replaced them with blocks for photos and also tucked a few quotes inside pockets that I could put photos on.
  3. I wanted room to journal about our trip so I created a few pockets to add journaling tags along with a few pages just for journaling blocks. I also used some of the titles that came on the sheet of journaling blocks. I cut them out and mounted them on cardstock then attached them to the top and bottom of some of my pages with pop dots.
  4. I added lots of ribbon, brads, chipboard elements and fun embellishments and used the distress stamps on every page.
  5. So make yours today with a few fun twists of your own.