Showing posts with label transparency technique. Show all posts

Wednesday, May 11, 2011

Transparency card ideas

I love the thought-blocks for making cards with. Such a perfect size and a nice little sentiment! Here are some ideas to get you started. To purchase these transparencies and others, go here.


Monday, February 21, 2011

Using Coaster Block Transparencies for Titles

I love the fun TTT Coaster blocks that come in our kits. Sometimes I have a hard time using them on my pages or figuring out how to make them pop. So I have come up with this flawless technique to pop them up on your layouts and use them as the title for the page all at the same time ( I am pretty sure Monica had this in mind too when she created them as my punches worked perfectly!)

  • Gather your coaster block transparencies
  • 2 inch punch
  • 3-3 1/2 inch punch or circle cutter
  • 4 inch circle cutter
  • Stickles, Rhinestones, gel pen optional
  • Letter Monogram, Number stickers or little letters
  • Glue dots and pop dots

Start with cutting your first circle 2" this will perfectly fit the inside circle of the transparency. Attach with glue dots. Then cut a 3-3 1/2 inch circle for the smaller outside circle. Mine is abot 3 1/4 inches because I liked it to stick out a little from the transparency circle. Attach it with glue dots also. Then cut your outer 4" circle and glue together. Embellish the outer edge with hand drawn stitches, Stickle dots, or rhinestones. Then add a number or letter that corresponds with your page. It could be the date, the year, age, Monogram, saying or anything. Add to your page using pop dots.

Here are a few examples:


Thursday, May 13, 2010

Transparency Technique

Using Coaster Blocks for Titles

Some of my favorite transparencies that TTT has to offer are the coaster blocks. I love their shape and the little saying around the edge of the circle that go with the title inside. I like to use them for the titles on my pages but sometimes have a hard time incorporating them into the page design so that they pop off the page. Here is two flawless techniques to help you make them take center stage!

Option 1: Cut around the edge of the circle on the transparency. Then cut a circle piece of coordinating cardstock. Take another piece of coordinating patterned paper. Mount the circle cardstock on it then use scalloped scissors and carefully trim around the edge to make a scalloped circle (if you have a scalloped circle punch big enough that would work too.) Then using glue dots or transparency adhesive adhere the transparency on top of the cardstock circle. Use Stickles glitter glue and make colored glitter dots on top of the dots around the edge of the transparency or color in spots with galaxy markers. Attach to your page using pop dots.

Example 1:
Option 2: Cut around the edge of the transparency. Punch a circle out of coordinating colored cardstock to fit the inside circle of the coaster block (I used a 1.5 inch punch.) Then mount that on a larger white circle followed by a scalloped circle. Or if you have circle journaling blocks (the one I used here is from Jenni Bowlin) those work great too! Then add a letter or number to the inside of the circle if it calls for it.

Example 2:

Friday, December 18, 2009

Gift Tags with TTT Transparencies!

TTT transparencies are a great way to add a personal touch to your gift tags this holiday season.

Here are a couple examples I used on my mom's presents:
Just add a piece of patterned paper to the back of a TTT coaster block. Here I used a star shaped piece of paper. Then, add to and from to the front, attach some embellishments, and add a ribbon to the top.
Here I added another star shaped piece of cardstock to the back of a TTT coaster block along with a piece of patterned paper cut to fit the circle. Before I attached the paper I painted the back of the Santa Claus. Then, I added to and from to the top along with some embellishments and completed my tag by tying a ribbon to the top.

So break out some of your scrap stash and create some personal tags today with TTT transparencies!

Friday, August 14, 2009

Transparency Technique

TTT Tip
Ever wonder where you're going to fit journaling into your mini album? Well, pull out your TTT transparencies! Instead of leaving pictures out, leave your journaling out. Out on a TTT transparency that is!! For one on my mini albums I used TTT coaster blocks to include my title, journaling, and date. I didn't have to sacrifice any pictures!

For my 4th of July mini album I used TTT coaster blocks to include fun elements and journaling.

The possibilities are endless so have fun including TTT transparencies into your next mini album!

Monday, June 15, 2009

Stickles, Stickles and More Stickles

I love using Stickles and if you are like me you have tons of bottles of this glittery fun stuff in all different colors and are always looking for fun new ways to use it up! Here are a few of my favorite techniques for this glitter glue!

  1. Stickles on Chipboard: First ink chipboard with matching color of ink. It doesn’t need a lot just a light coat. Then squeeze Stickles generously on top. You can use the tip of the bottle to smooth it out but I prefer to use my finger. (Just make sure you have a sink or paper towel handy or you might end up quite glittery! The end result is stunning I think and if you like a glossier look you can add diamond glaze over top and if you want a less glittery look try Distress Stickles.
  2. Stickles on patterned paper: There are a lot of fun designs for patterned paper out there right now. So why not jazz those up a little with some Stickles. (You knew I was going to say that right?) You can either doodle right on your patterned paper or cut out a design and apply stickles to desired area. For this one I used the tip of the bottle to give it a little bit of a swirly effect like frosting.
  3. Stickles as Doodles: Doodling is all the rage right now so why not doodle with some pizzazz! Grab a bottle of stickles and add scallops, swirls, trails, or dots to your pages right now!
  4. Stickles on transparencies or overlays: Ok I know you have these so right not add some spice to them! Doodle, fill in or color in your transparencies or overlays on your next project. For these Overlay flowers I added a light coat of Stickles then smeared it around carefully with the tip of the bottle.

And this flower is the new Distress Stickles!

So get out those bottles of stickles and add some pizzazz to those pages and project today. Remember to allow at least an hour or two for the Stickles to dry completely before touching or adding the page to your album. And don’t forget to share your favorite Stickles technique with us in your comments!

Thursday, May 21, 2009

TTT Transparency tip

Spruce them up

by Carrie L.

I love to use the TTT  Bracket blocks for my titles.  They are a fun way to add more to what you want to say without taking up a lot of room.  Plus there are so many to choose from and you get 8 on a sheet.  There are quite a few ways to spruce them up to make them more colorful or 3-d.  Just a few ideas:

Add stickles to make them glittery

Add bling to give them some shine

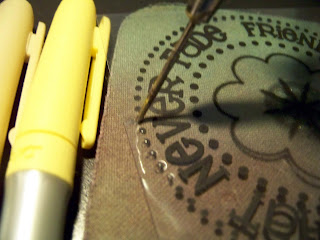
Color in words with Sakura soufflé or glaze Pens

Use pop dots to apply them

Add them over a Thickers title

 ---> I made this example using 3 of the techniques listed here.

Steps:  Make page,  add Thickers title, color in word on TTT bracket block with soufflĂ© pen,  add bling to flower centers, adhere title with Tombo vellum adhesive runner, embellish page!


I hope you give these techniques a try I would love to see what you create when you upload it to the TTT gallery!

Tuesday, May 12, 2009

May technique by Lindsey Krauss

You might have seen my layout this month titled “Water Watch” and wondered about the treatment of my TTT transparency. I’ve been searching for new and exciting ways to use TTT’s transparencies. Actually, I’ve been looking for something they CAN’T take (and I’m still looking for that!). Today, I’m punching holes all over my TTT transparency coaster!

Whether you call it paper-piercing (not piecing), hole-punching, Crop-a-diling, or creating a Swiss look, I’m going to show you a few techniques of how to make your transparency holey.

The first thing I tried was my We R Memory Keepers’ Crop-A-Dile II. I wanted to see how clean the cut was when I used the hole punch feature. No problem! ! I’m using a TTT coaster today and I used the flower’s center and dots as a guide to punch. I later threaded yellow sewing thread in a star pattern and tied them in front, creating a cute little center for the flower (I tinted the full flower with a Bic Mark-It on the back of the transparency.)

Next I tried my paper piercer. I used the dots on the outside of the coaster as a guide this time. . I then hand-sewed more sewing thread. Note: Put a mouse pad under your transparency for ease when piercing. Also, hand-sewing ALL those dots becomes quite tedious – I chose to sew through every other hole to save time and my hand!

I still have my old punches lined up, hand held and shapes. I’d like to try the larger punch on the Crop-A-Dile II, and I was thinking of tying knots up through the holes, adding eyelets and jewelry to the holes I create. The possibilities are endless.

Willing to try this hole-punching technique? Upload it to TTT’s User Gallery and post a comment back here to show us!


Wednesday, November 5, 2008

TTT Transparency Tip

TTT Transparency Tip
This is a two-for-one tip!

by: Chrissy Greenman


Recycle: After you cut apart your 8 x 11 transparencies save the scraps. You can use them to create custom made transparencies for your layout. Cut them into the desired shape, such as a leaf, and embellish as you choose. You can paint them, doodle on them, ink them, sew them…..there are so many possibilities.


Here's a closer look at the transparency leaves
that Chrissy cut out, inked and stitched on!


Sewing: This leads me to my second tip: sewing on transparencies. It is so easy and really makes a statement. You can sew them onto your layouts instead of using glue dots!! You can also sew designs on them such as the veins of a leaf. It is much easier than you may think.

Tuesday, October 21, 2008

Transparency Technique - fun with rub-ons!

Did ya know? I didn't!
Rub-ons and Your Transparencies

Just recently I discovered that you can use rub-ons right on a transparency! I don’t know why I never tried it before, but I’ve now realized that it’s an easy way to add color and flair to your transparent pages.
This layout, using an 8.5” x 11” TTT transparency, uses only patterned paper and rub-ons as embellishments, aside from the 2 brads anchoring the transparency. It was so much fun using these super colorful and bright rub-ons from the Fancy Pants TTT October kit in layers creating a depth with the transparency as another layer.

See all these rubons, here? Let’s start from the layer bottom to top. The black stitching rub-on (WRMK) is rubbed onto the background paper, under the patterned. The blue stitching (Daisy Hill) is also under the transparency, but over the patterned paper, as is the smaller arrow and beige flower (WRMK). On top of the transparency is the larger arrow and turquoise flower. The large beige and orange flower is slightly on the transparency – and there is not even an interruption in the design. (You can also see this in the little birdie, lower right, on the full page.)


There is also some depth on the left-hand side of the page, under and over the black flowers printed on the transparency. I used the WRMK kit rub-ons: a line of circles is under the transparency and each printed black flower is adorned with a flower on top of the transparency. Above this strip is another rub-on, a large set of flowers and swirls that run off the transparency onto the patterned paper; again, no interruption!

So the next time you’re thinking of adding a little color and depth to your transparency, think rub-ons! Link your “rub-on-+-transparency” layouts here for us all to see!