Showing posts with label step by step. Show all posts

Thursday, April 7, 2011

Step by Step for a not-so-clean and simple layout

by Nathalie


Hello TTT fans! I have created this clean and simple "Champion" page especially for you! I will explain below how you can recreate it with your own twist and you own photo of course! As with all step by step on this blog, we would LOVE to see anything you create with it!
Let's get to it:

Supplies:
(some of you might recognize a few papers from the February kit #2)
- 2 pieces of 12X12 cardstock
- striped paper measuring 2"x3.75"
- dotted paper measuring 4"x7.5"
- number paper measuring 1 1/8"x7.75"
- one photo trimmed to 3.75"x5 5/8"
- plain coordinating paper to print your journaling on
- 2 pieces coordinating scraps
- 1.5"circle punch
- 2 chipboard stars (I used Scenic Route)
- tag with string
- chipboard alphabet (naked)
- marker for doodling
- paint and paint brush
- computer to print journaling
- sewing machine

A lot of these are of course optional, depending on how far or how close you want to stay to my page!

1/ Cut one sheet of cardstock to 11"X11" and adhere it to the center of your background cardstock. Add sewing around to frame your page (you could also simply doodle a frame)

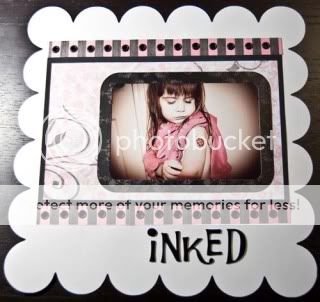
2/ Place and adhere your three patterned papers cut according to the measurements above and your photo as seen here: (use a ruler to center everything if necessary)

3/ Print your journaling on your coordinating plain paper (or handwrite it) and cut into strips. My strips are about 3.5" long and the font I used is American Typewriter. Adhere your strips and place your title.

4/ I then covered my chipboard stars with another coordinating paper and used the back of a patterned paper to cut a 1.5" circle. Place and adhere your embellishments as seen on the finished page.
Here's the "not so clean" part: I splattered a bit of diluted paint directly onto the stars by simply scrubbing a paint brush with one finger over them. You can of course totally skip this step...

My final touches were to add doodles on my chipboard letters and my stars and to tuck a little tag on top where I have added a bit more info about the photo (and the reason for the quote)...

I'll be happy to help if you have any questions! Simply leave them in the comment section. Cheers!

Tuesday, March 15, 2011

Pocket Card - STEP by STEP

Pocket Card

Instructions
1. Start by cutting a 4x12 piece of double-sided patterned paper.
2. On the side that you want to be the inside of the card, score at the 4-inch and 8-inch mark vertically.
3. Fold the left-most portion over the middle portion. On the right-most portion, I've drawn a line here to indicate where I will be cutting (from the top-left corner to the bottom-right).
4. Cut as indicated. Apply glue to the bottom of the triangle only.
5. Fold the triangle over the middle section (lift up the other side first) and press to adhere the glue, creating the pocket.
6. Embellish as desired.
7. Fill pocket!
This card was made with TTT May kit 2010 #1.

Thursday, March 11, 2010

Step by Step: try a different format!

by Nathalie
Some of you already know that I like to scrapbook in various sizes and with this step by step, I would like to encourage anyone who hasn't yet, to try an 8.5X11 page. I believe that switching size will actually give you a creative boost!
But of course, if you have to make a 12X12, you can still use the instructions. You would just have to change the measurements.

Supplies:
- two colors of cardstock
- 3 patterned papers or 2 + journaling paper
- alpha stickers
- embellishments such as buttons and stickers

1/ Cut your background cardstock to 8.5X11 if necessary, then cut and glue one piece of patterned paper measuring 9.5X7 on top of it:


2/ Cut second piece of cardstock to 7.75X4 as a mat for your photos. I think you can use anywhere between 1 and 3 photos with this design. I used 2. Position (don't glue yet) your mat with photos in the top third of your page.

3/ Cut a piece of patterned paper to 6X3.5 and slide it under your mat on the bottom portion of your page and adhere.

4/ Print (or write) your journaling on a piece about 3.5X3 and position it on the left part under your photos. Add another matching piece of journaling paper (1.5X3) on the top where the title will go. Glue everything down.

5/ Place your title and embellishments. And your page is complete!

Click on any photo to enlarge it

Thank you for stopping by. As usual, if you have any questions or if you make a page based on this step by step, leave us a comment!

Thursday, February 11, 2010

Step by Step

This month's step by step layout features a page highlighting a large die cut or sticker. So first things first gather your 2 4x6 photos and favorite matching die cut. Or create one using a die cut machine like I did here with my Minnie Mouse.


Supplies:
4 sheets different colors cardstock (2 can be scraps)
2 4x6 photos
1 strip patterned paper
1 large die cut or sticker

Steps:
  1. Cut one sheet cardstock to 11.5"x 11.5". Attach it to the 12x12 sheet leaving a border all around. Stitch around edges or draw stitches with a pen.
  2. Add a 6x12" piece of patterned paper across your layout horizontally in the middle. Then add a 4x12" piece of cardstock across the right side of your layout vertically. Stitch edges if desired.
  3. Mount your 2 photos on coordinating cardstock cutting the horizontal one down to 4x3". Add them to your layout with the large one slightly overlapping the vertical piece of cardstock. Then add your die cut overlapping the bottom right hand corner of the large photo. Use pop dots for extra dimension!
  4. Add a title under the large photo and an extra large photo corner in the top left hand corner.
  5. Add flowers or other little embellishments along the left edge of the large photo. Add a few rhinestones or embellish as you like.
  6. Type your journaling and cut into small strips. Adhere them to the right of your die cut.
  7. Walla your done!

Wednesday, December 30, 2009

Step by Step Using Kit #2

Hi All,

While these directions will be generic enough to follow to create any page, for those of you who got kit #2 for December, all the supplies you need are in that kit except for the basic tools. I really like how this page turned out and I hope you do to. I did try to scan this page several times (ok, more like 20 times) but my scanner hates anything off center and tries to straighten it and so sometimes I just can't make it work no matter what I do. I think I own the first scanner ever created, lol. So I took some photos and hope they show the detail well enough.


Materials:
1 5x7 photo
1 cardstock for your background
2 different patterned papers
2 scrap papers to edge(the paper came that way but if you have any edge punch like the martha stewart ones or EK Success ones, they work great too)
1 rub on
1 pattern paper to cut designs from. I used the monster paper but you can use anything to get the effect
pop dots
black ink
distress tool (I use the Tim Holtz one...it's awesome!)
1/2 alphabets for title

Directions:
1-Use the cardstock as your base to build on. I cut one pattern paper to 10x5 and distress all edges and ink with black ink.
2- I use the other pattern paper to cut two rectangles, one 4x2 and one 6x2. I distress and ink those as well and put aside.
3- I used pre-edged Sass paper but edge two other scrap pieces of paper with any edge you like and put aside.
4- Adhere the smaller squares first. Placing the 6x2 at the top on an angle and the other smaller one in the bottom corner about 1/3 in from the edge of the page as shown.
5- Then adhere the big 10x5 square
6-Line your edge scraps up on either side of the 10x5 paper and adhere. This gives a nice layered look but still leaves some open space.
7-I cut some monster frames from the monster paper that came in the kit. You can use anything or even just do circles if you like. I used 3 and put pop dots under them to give a nice dimensional look to the page.

8-Use a rub on as shown (the robot)
9-Arrange your title as shown overlapping some of it onto the patterned paper.

Thursday, November 19, 2009

Step by Step

Supplies:

Cardstock
3 strips of patterned paper
3 similar embellishments
alphabet letters for title
journaling strips


First, arrange three different sized strips of patterned paper.


Second, add three 3 x 3 pics cropped on white cardstock. Place photos on angles above strips of patterned paper.
Third, add your three embellishments to your layout as shown.

Last, add your title and journaling strips to the bottom of your layout!


Voila!! Simple, easy, and quick : ) ENJOY!

Thursday, September 24, 2009

Step by Step

by Nathalie
Supplies:
- 12"x12" patterned paper for background
- 4"x4" square and 2" round photos
- 3 different patterned papers in the following size: 4"x1/4", 4"x31/4' and 4" long skinny border
- 2 journaling spots
- 1 big brad
- 1 big chipboard bracket
- cardstock scrap at least 3" long to print journaling on
- optional: corrugated cardboard and paint

1- Distress 12X12 background patterned paper as much or as little as you like.
2- Place 4"X4" photo, 4"x1/4" striped strip and 4"x31/4" paper under each other as show on photo below. Add journaling spot (cut in half) under the photo before adhering everything.


3- Place and adhere circle photo
4- Add small border on top of the 4x4 photo and embellies like the brad, the chipboard bracket, the journaling spot on the upper left corner. Adapt to make it your own :)
5- Print, cut to about 3x1/4", and adhere journaling strips


6- If you wish, tear and roll some of the edges of the background paper, and tape some painted corrugated cardboard behind to let it peak through.

"The homemade ghoul" by Nathalie

Let me know in the comment if you have any question! Thank you!


Tuesday, August 18, 2009

Step by Step

Lots of Layering

Supplies:
  • 3 sheets cardstock
  • 4 patterned papers (3 scraps are ok)
  • 2 photo corners or make them from scraps of pp
  • 1 paper flower and 1 die cut flower
  • 4 buttons
  • chipboard letters or thickers
  • brackets (hand cut, die cut, chipboard, etc.)
  • 1 journal spot
  • small piece of ribbon
  • 2" square punch
  • stapler
Step 1: Use one 12x12 piece of patterned paper for your background but punch a 2"square from the middle first by folding it in half to save for later. Layer a 10.5" square piece of cardstock to the middle of the patterned paper then another 10" square piece of cardstock on top of that.


Step 2: Mat 2 4x6 photos onto two cardstock mats 4.5 x 6.5. Adhere them near the top of the
10" square. Punch 3 more 2" squares from patterned paper and adhere those in a row under the photos.

Step 3: Add flower to bottom left hand corner of left photo. Adhere bracket over top and one overlapping the bottom of the right photo. Use chipboard or thickers to add title in between. Add a button for the flower center. Glue photo corners (use premade ones or make your own from patterned paper) to the top corners of the cardstock mats. Staple a piece of ribbon to a journaling card and tuck under top of right photo. Adhere die cut flower and 3 buttons to bottom right corner of cardstock mat overlapping the bracket. And your done!

Friday, July 31, 2009

Step-by-Step - Fitting a square peg into a round hole

This layout is all about quick and easy with two very basic shapes: circles and squares!


What you'll need:


  • *2 pieces of cardstock (or solid patterned paper)
    *3 pieces of patterned paper
    *embellishments

  • *pens

  • *don't forget your TTT coaster!


And here's what you do!


1. Set aside cardstock as your background page. Cut three pieces of patterned paper into 6" squares and round edges.


            2. Ink edges of patterned papers and arrange with photo on top. Do not adhere photo, but adhere papers in the middle only.


            3. Remove photo. Cut a large circle from dark cardstock (mine was a scrap piece!) and layer over and under three patterned pieces.


            4. Adhere photo, title and embellishments. Include lots of other circle- and square-shaped embellishments like a TTT coaser, buttons, rub-ons and tags. I even doodled circles and squares on the final layout.


            Have fun mixing shapes on your next layout. Show us how creatively geometric you are on TTT's message board and User gallery!


            Transparently yours, Lindsey

            Tuesday, May 26, 2009

            Step by Step

            Supplies:
            4 sheets patterned paper
            large embellishment
            alphabet stickers in various colors and sizes
            ribbon

            Step 1- Mount a 5x7 photograph to patterned paper leaving a 1" frame all around. Adhere matted photograph slightly off center and tilted to the right:

            Step 2- Mount two 1" strips of patterned paper to the right side of the photograph in various lengths. Adhere large embellishment to the top right of the photograph.


            Step 3- Add title to the left side of the photograph using alphabet stickers in various sizes and colors. Adhere a ribbon under your title. Add small journaling strips to the bottom right side of your photograph.

            Tuesday, March 17, 2009

            Step by Step

            by Nathalie

            Note: If you do not want to make an 8.5X11 page, this design can easily be adapted to a 12X12 page, just change the measurements slightly.

            Supplies:
            - 8.5”X11” patterned paper for the background
            - 8”X10.5” piece of cardstock (I used kraft)
            - one photo cropped to 5.5”X4”
            - 2 pieces of the same patterned paper cut to 4”X2 1/8”
            - 1 strip of patterned paper measuring ½”X 9 ¾”
            - 1 strip of paper for the journaling 1 ¾”X9 ¾ “
            - 1 Heidi Swapp damask sticker (in white) cut in half
            - 4 photo corners
            - alpha stickers for your title
            - a few flowers and brads

            1/ Glue the cardstock to the background paper then frame the photo with the two pieces of paper (the 4”X2 1/8” pieces) on each side of it.
            2/Print or handwrite your journaling on the wider strip of patterned paper (make sure you leave enough room to tuck it under the other strip and for the photo corners.
            3/ Place the two strips of paper under your photo but do not glue them until you position and adhere the damask sticker that you previously cut in half. Place the photo corners.


            4/ Finally adhere everything and add your title with various stickers and embellish with a couple of flowers and brads.

            Tuesday, February 17, 2009

            Step by Step


            12x12 Layout Instructions

            Gather Supplies: Bazzill scallop cardstock, solid cardstock, patterned paper line, letters, embellishments, 1 photo

            1. Cut a 9.5 x 6 inch rectangle from your cardstock, cut ¾ inch strips from patterned paper and a 9 x 5.5 inch rectangle from patterned paper.
            2. Adhere smaller rectangle inside bigger one then adhere to scallop cardstock. Attach strips above and below the block.

            1. Add photo to right side of block and embellish with frame
            2. Punch holes along strips and attach eyelets. (Use up that stash!)
            3. Add title at bottom right

            1. Add painted grungeboard or chipboard element next to title (I used glitter mist on mine to make it shimmery.)
            2. Embellish title and 4 corners with bling.
            3. Add 3 stars, hearts, flowers (whatever works for your page) down the left side of your photo.
            4. Write journaling on a matching tag, tie with ribbon and slide under photo with the top corner sticking out.


            And you’re Done!