Tuesday, January 12, 2010

January Kit #2 Layouts

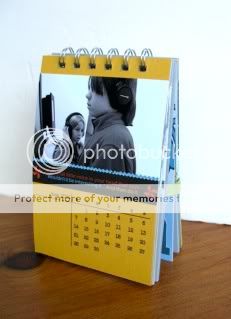
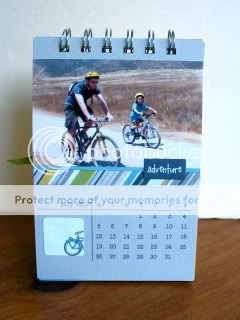
Take a look at the awesome projects made by TTT designers Nathalie and Jen with TTT January kit #2- Scrap Within Reach- Paper Boy

Jen's Designs:


Nathalie's Designs:


January Kit #3 Layouts

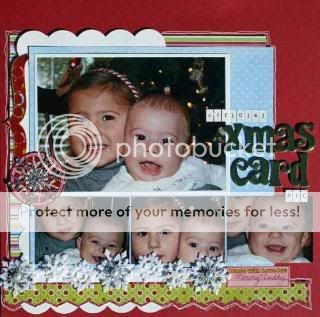
Take a look at the amazing designs created by Chrystal and Chrissy with the January TTT kit #3- Fancy Pants Frosted.

Chrissy's Designs:


Chrystal's Designs:

Transparent Tuesday

Hello!
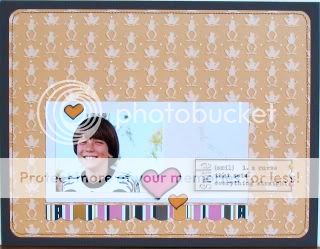
It's transparent Tuesday here at TTT and so we would love to share a few layouts done by the TTT design team using Monica's fabulous TTT transparencies!

By Carrie and Nathalie:

By Chrystal and Jen:

By Chrissy:

Friday, January 1, 2010

January Monthly Kit Contest

by Nathalie
Happy New Year TTT kit fans!
1/ During the cold winter months, a blue and sunny sky is always a mood lifter
2/ All three January kits have it in them
and 3/ My first two January DT pages happen to match the requirement for this contest!

Did you figure it out yet? Smile For this month's contest, make a page with a blue background with any Transparent Touches kit . It can be cardstock or patterned paper but the background has to be blue (any shade) and you have to use one of TTT's kits (old or new).

Please refer to the rules HERE for additional details. Due date this month will be midnight PST on Sunday January 31st. Winner will be determined by drawing. You can enter as many times as you like. 2 page LOs count as one entry.

You can post your pages in this thread to share but in order to be in the contest you must post your pages in the gallery under the "January 2010 Contest Work Gallery" (I know that some of you have been having trouble with the Gallery so we will take that into account until it is resolved).

Have fun!!! Can't wait to see your pages!

Wednesday, December 30, 2009

Step by Step Using Kit #2

Hi All,

While these directions will be generic enough to follow to create any page, for those of you who got kit #2 for December, all the supplies you need are in that kit except for the basic tools. I really like how this page turned out and I hope you do to. I did try to scan this page several times (ok, more like 20 times) but my scanner hates anything off center and tries to straighten it and so sometimes I just can't make it work no matter what I do. I think I own the first scanner ever created, lol. So I took some photos and hope they show the detail well enough.


Materials:
1 5x7 photo
1 cardstock for your background
2 different patterned papers
2 scrap papers to edge(the paper came that way but if you have any edge punch like the martha stewart ones or EK Success ones, they work great too)
1 rub on
1 pattern paper to cut designs from. I used the monster paper but you can use anything to get the effect
pop dots
black ink
distress tool (I use the Tim Holtz one...it's awesome!)
1/2 alphabets for title

Directions:
1-Use the cardstock as your base to build on. I cut one pattern paper to 10x5 and distress all edges and ink with black ink.
2- I use the other pattern paper to cut two rectangles, one 4x2 and one 6x2. I distress and ink those as well and put aside.
3- I used pre-edged Sass paper but edge two other scrap pieces of paper with any edge you like and put aside.
4- Adhere the smaller squares first. Placing the 6x2 at the top on an angle and the other smaller one in the bottom corner about 1/3 in from the edge of the page as shown.
5- Then adhere the big 10x5 square
6-Line your edge scraps up on either side of the 10x5 paper and adhere. This gives a nice layered look but still leaves some open space.
7-I cut some monster frames from the monster paper that came in the kit. You can use anything or even just do circles if you like. I used 3 and put pop dots under them to give a nice dimensional look to the page.

8-Use a rub on as shown (the robot)
9-Arrange your title as shown overlapping some of it onto the patterned paper.

Friday, December 18, 2009

Gift Tags with TTT Transparencies!

TTT transparencies are a great way to add a personal touch to your gift tags this holiday season.

Here are a couple examples I used on my mom's presents:
Just add a piece of patterned paper to the back of a TTT coaster block. Here I used a star shaped piece of paper. Then, add to and from to the front, attach some embellishments, and add a ribbon to the top.
Here I added another star shaped piece of cardstock to the back of a TTT coaster block along with a piece of patterned paper cut to fit the circle. Before I attached the paper I painted the back of the Santa Claus. Then, I added to and from to the top along with some embellishments and completed my tag by tying a ribbon to the top.

So break out some of your scrap stash and create some personal tags today with TTT transparencies!

Thursday, December 17, 2009

Christmas Tags

All Christmas packages need a fun tag attached saying who it's to and who it's from. Instead of using the generic stickers you can buy at the store why not make your own out of your scraps! Not only will it add a fun flair to your package but also help use up your scraps.

For my first two sets of tags I used scrap pieces of cardstock that I cut into 2.5"x3.5" rectangles and then snipped the top two corners. I added strips of patterned Christmas paper to the bottom and embellished with shapes cut from patterned paper or cut out stamped images. Then i punched holes at the top and tied with ribbons.

Tag set #1:

Tag set #2:


For the last two sets I used a to/from circle stamp that I had but this same technique could easily be done by using letter stamps and just stamping the words to/from next to each other and then using a circle punch to cut out. Or you could hand write the words or use rubons too! After wards I mounted the to/from circles to a bigger cardstock circle and then mounted that on an even bigger patterned paper circle. Then I embellished them with cut out shapes from patterned paper or cut out stamped images embellished with Stickles! Punch a hole in the top and tie with ribbon.

Tag set #3:

Tag set #4:

Can't wait to see your Holiday tags too! Post them in the Off the Page thread of the TTT Message Board.

Homemade Embellishment Fun

Making the Most of Your Patterned Paper Scraps

Sometimes the patterns on patterned paper are too cute to throw away the scraps. So cut them out! Cut out the rest of the whole images left on your scraps and set them aside to decorate and turn into fun embellishments for your cards, tags or even layouts! Here I cut out the leftover snowmen, stars and trees from scraps of Christmas paper.

Then I added Stickels and Glaze pen to them for a fun look!
Now use them on your Holiday cards and tags!


Tuesday, December 15, 2009

Handmade Holiday Gifting by Chrystal Riddell


With the holidays already here, those hand-crafted gifts you'd been planning may have gotten skipped over for more urgent things, like shopping, baking, or most likely, life itself! Don't worry; you still have time to put a personal touch on those special items you worked so hard to find. With just a little planning, you can make lots of treat boxes and bags in a few hours or less. If you have kids, get them involved. These are great for teachers gifts, friends, cookie swaps, and more! The small size of the treat boxes makes them perfect for homemade candy, one brownie, a few cookies or even a gift card.

Supplies needed:

*blank bags and treat boxes (found at craft stores)
*several sheets of coordinating paper--can be 8 1/2 x 11 or 12 x 12
*fun accents--I found mine in the gift tag/craft/kids sections of my local craft store
*rub-ons, stamps, or stickers for sentiments

The smaller bags shown here are generally 8 x 4. If you use 8 1/2 x 11 paper, you can get (2) bags and (2) treat boxes from each piece of paper. If you don't want to buy paper just for this, use up those scraps!