Sunday, December 7, 2008

December Kit #2

It's Reveal Day!!

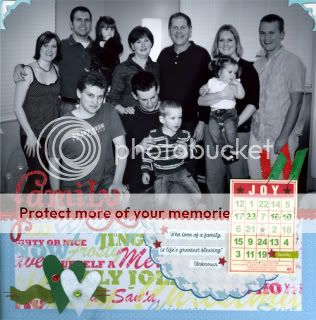
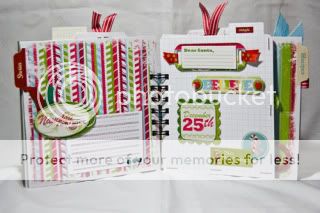
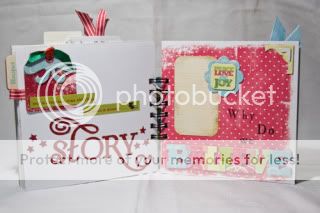
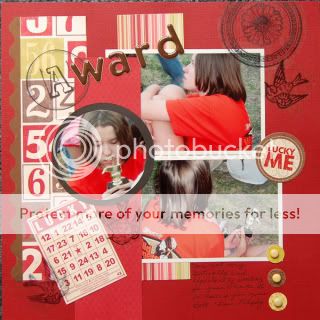
Nathalie and Jen did a fabulous job this month creating layouts with the December kit #2. This kit is perfect for your all your family moments together . Great job ladies! Remember, you can go to the TTT User gallery (http://www.transparenttouches.com/gallery/index.php?cat=46) to see all the kit reveals from each month and the TTT gallery (http://www.qbaroo.com/transparenttouchestags/index.cfm?galleryoid=0) also has an album for each DT member which showcases their layouts too. Happy scrapping everyone!

Here is what Nathalie created this month:
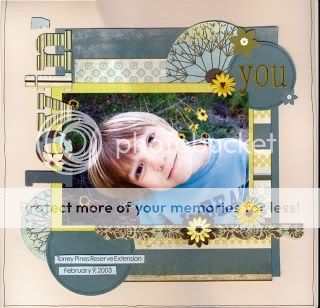


Here is what Jen Created this month:


December Kit #3 Layouts

It's Reveal Day!!

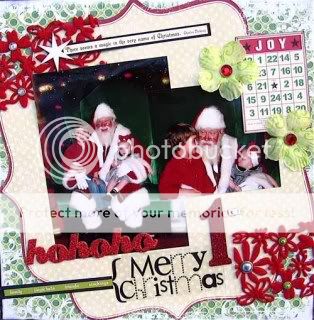
Carrie and Chrystal did a fabulous job this month creating layouts with the December kit #3. This kit is perfect for all your Holiday pictures from the festivities of the month. . Great job ladies! Remember, you can go to the TTT User gallery (http://www.transparenttouches.com/gallery/index.php?cat=46) to see all the kit reveals from each month and the TTT gallery (http://www.qbaroo.com/transparenttouchestags/index.cfm?galleryoid=0) also has an album for each DT member which showcases their layouts too. Happy scrapping everyone!

Here is what Carrie created this month:


Here is what Chrystal Created this month:


Wednesday, November 26, 2008

November Photo Tips

Tips for taking better photos and to step out of the box... a little.

I am not the best photographer and have just began to dwell into what my camera can do but I wanted to share these photo tips that I have learned with you. If you have some good tips too please share along in the comments section or on the message board. I am always looking for new things to try. These tips are good for everyday shots and even some Holiday shots I hope.

For Tip #1 when taking close ups of people set your camera to Aperture priority (A) or the portrait or child mode. This will allow for the background to be blurry which is ideal in a portrait. If shooting in Aperture Priority you want a Low F number which is a shallow depth of field, I usually use something around 4-5. It seems to work best for me and is about as low as my lens will allow me to go. If shooting in the child mode the camera usually will adjust the setting for you so you have a low F number and generally same with the Portrait mode. You will just have to play with your camera and see what happens. While taking the close ups try to get as many angles as possible; above, below, profile, just there eyes, even try tilting your camera a little. I love this photo of Sydney and her hazel eyes. I tried to make the focus of the photo on her eyes not worrying about if I was cutting off part of her head or not. I even tilted the camera slightly to give it a little different angle then just straight on. The second one I was just right in her face snapping photos until I got one with a smile. My aperture was set a 4.4 and I love how the background looks so pretty and blurred but she is in focus.

For Tip #2 if your subject will just not sit still (which if they are like my kid at all then they won’t) then get them involved in the photo shoot. Have them run around, act crazy and have a good time. This will ensure that you get some fun, action filled photos and your kid as themselves instead of just saying cheese. Don’t be afraid to chase after them, run ahead of them or continue to take shots even if they are still far away. There has been plenty of time that I took a shot far away only to zoom it in later and see that it was actually on of my favorites. If your camera is at least 5 megapixels you shouldn’t have a problem cropping your photos unless you are planning on printing them poster size. Both of these photos were cropped later. I love how the first one looks like you are right in front of the action while the second one captures her at just the perfect moment and she doesn’t even know it.


That brings me to tip #3 don’t be afraid to try new things. There are a million shots out there waiting to be taken you just got to try them. There has been plenty times I have taken a shot only to find out later that it didn’t really work but other times when I ended up loving them. You don’t always have to shoot your subject from the front or when they are looking at you sometimes the little details are what matter most. Try shooting them walking away, their backside, their new shoes, the side of their face, a close up of their toes, anything.

I mean who could have thought her booty could be so cute.

Or here I love how my sister Anna captured the side of her son’s face. I never thought a profile picture could be so cute, even though most of the picture is of his hair and ear.

So I challenge you to get out there and shoot some photos. Take lots, lay on the ground, get above and below your subject, take some shots you wouldn’t normally take and play around with the aperture and settings on your camera. Have fun and if you get some awesome shots share them here in the comments or the Photography section of the TTT Message Board. We would love to see what you come up with! Happy Shooting!

Monday, November 24, 2008

November Technique

Punching Shapes out of Transparencies

For our technique this month I thought it would be fun to do something else with Transparencies. I know you have all seen the printed transparencies or overlays out that with the pretty stripes or dots or patterns on them. I know I am always drawn to them but then have a hard time actually using them when I sit down to create. Well here’s a fun technique to try; cutting them into shapes or punching them.

For this first example I used my circle cutter to cut 4 big circles out of 2 different patterns of the overlays. I adhered them with glue dots to the top of my layout and completed and embellished as necessary.


For this second example I used a scallop circle punch to punch pretty shapes out of my transparency. Beware though sometimes this can be hard to punch through and you might have to get your husband involved in the crafting! Then I added the shapes to my card and embellished with jewels.

This could be really fun to punch shapes like stars, hearts, leaves, flowers or anything for your pages. You could get quite a few embellishments out of each sheet too which is good for your budget. Now you can tell Hubby he was helping out with the budget when you get him to help punch!

Thursday, November 20, 2008

Tag Ideas by Chrystal Riddell

Next time you only have a few creative minutes and don't want to start a page, pull out your TTT transparency stash and see what catches your eye. For these little quickies, I had some die-cuts and paper scraps right next to me, so I got right to work. For the "Girl" transparency, I knew I had paper to match these die-cuts, so I wanted to make a page accent I could add to a page later. I simply layered the flower and leaf flourish, added the transparency block with glue dots, the letters and rhinestones. Voila! I knew I could always use a birthday tag accent, and this one can easily be added to the handle of a gift bag. I used a leftover phrase cut from an 8 1/2 x 11 transparency, then built the tag out of paper & ribbon scraps, die-cuts, and rhinestones. Go ahead and tie the ribbon knots loosely, that way when you're ready to use it you can untie them to attach it to the gift bag. Just write your message on the back!

Photobucket
Photobucket

What a Catch! by Nathalie

For What a Catch November
Halloween Haunted House mini album by Rozy (ROZY)
Let me start by saying I love mini-albums (only scrappers would understand this bumper sticker!) and this Haunted House by Rozy definitely caught my eye in the TTT Gallery. I love the album she used and the fact that it has different shapes in it. Rozy did a great job adding tons of photos in it and embellishing it. The fact that it covers 10 years of her grandson’s Halloween makes it even more special. Love it!

For What a Catch November
“Lovin’ you” by Mona (Mon@)
I have always been a fan of Mona’s work and, once more, I admire the page that she recently shared with us. I especially like the softness that emanates from it. Its simple design makes your eye focus on the photo. I also love the fact that she hid her journaling on a tag behind the photo. Great job!

For What A Catch November
“Party on the beach” by Kimberly Archer (kimberlyatiga)
What can I say, this page by TTT DT alumni Kimberly makes me happy. I love that it has both bright colors and a weathered look which are perfect for a beach side photo. Notice how she used strips of patterned papers matching the colorful houses. And last but not least, check out the stitching. It frames the page, anchors the ribbon and adds texture. Love the stitching!

Wednesday, November 19, 2008

November Project--Anniversary MiniAlbum by Chrystal Riddell

A few months ago I made a photo collage of my favorite "self-portraits" of me and my husband. I had this printed as a 4x6, so each picture was about 1 1/2 x 2. I decided to make a mini-album in honor of our anniversary this past month. My goal here was to make it fun, simple, and "go-with-the-flow." Although it was hard to let go, I didn't let myself plan each page ahead. I gathered some paper scraps, buttons, punches, and a sheet of die-cuts.

1. When starting out a mini-album with a uniform shape, trace, cut, ink, and adhere all the background pages first. This will save "thinking" time that you'll need for the goodies!

2. Ok. I did plan a little. I had to see how many photos I had and how many pages I had. That left me 2 spots left over to journal on.

3. I started with the cover. I never start with the cover. Why did I do this? So I couldn't change my mind, obsess over the title, then change it again. This sheer ticket was cute, it fit the theme, I stuck it down. Done!

4. I then embellished and added pictures, each page at a time. (With Zip Dry paper glue, so I couldn't rearrange stuff.) A paper scrap here, a die-cut there. Don't think about it. Just do it! Making this album helped me realize that I could have spent days on this, and it probably would have turned out the same way.

5. Use your own handwriting. I resisted the urge to go to the computer, where I would have gotten side-tracked, probably on the TT message board. This easily saved an hour :lol:

Tip: As a fun way to add some chunkiness to this album, I popped up the photos with foam squares.

PhotobucketPhotobucketPhotobucketPhotobucketPhotobucketPhotobucketPhotobucket

Saturday, November 15, 2008

Member Spotlight

Your TTT member name?
Marge37

Tell us a bit about yourself and your family (and pets?)
I am retired after spending nearly 30 years in a law office in various capacities – legal secretary, paralegal, office manager. Prior to that I taught 3rd and 5th grades for about 10 years. I am a widow, have two grown daughters, two stepdaughters, one stepson, 11 grandchildren and one great granddaughter. I just recently downsized from a 7 room house to a 2-bedroom condo/townhouse where I can be near family. I am a cat lover. Currently I have four cats (although my condo regulations say two is the limit), a 9-year old male Snowshoe named Fideaux and pronounced Fido, a flame point Siamese male, approximately a year and a half old, named Nutmeg, two female 5-month old British tabby kittens, Scout and Sissy, whom I call "the Twins". You’ve seen them all in my layouts.

How did you get started in scrapbooking?
I started scrapbooking when my oldest daughter was a Creative Memories consultant. I had a party/class at my house as a help to get her started. From that moment on, I was hooked. Since that time, I have left the CM method of border, corner and stickers behind.

How long have you been scrapbooking?
I started scrapbooking about 7 years ago. Since then, I have done about 22 albums – a couple 5x7's as gifts, one 5x7 for myself. The rest were 12x12.

What is your favorite place to scrap?
I like to scrap in my own scrap room. I like to have all my own materials at hand so I can do a layout from start to finish.

What are your favorite scrapping snack and drink?
While I am scrapping, I neither snack nor drink, at least not in the scrap room. I’m very anal about not getting anything on my layouts.

What product(s) are you addicted to right now?
I am addicted to the Cricut. I have both the Design Studio and SCAL. I love to use SCAL for titles. I am also addicted to TTT kits.

What inspires you creatively?
Sketches, contests, challenges and nice comments on my layouts from the board.

What brought you to TTT?
My friend, Shirl (kkrewtea), recommended that I join in on a cybercrop last year in the Spring. I’ve been here ever since.

What do you enjoy the most about TTT?
I love the friendly people and the feeling of real concern I receive from responses to my posts. I have always felt welcome. Since I get many nice comments on work I do, I get the feeling that the board members really care. I’ve met some very nice people through TTT and have developed a long distance friendship with Rozy.

What is on your scrappy wish list?
White organizational storage cubes. I just moved and would like to make my new scrap room really nice. I have seen what I want in a catalog but I have to wait awhile to get them.

What is something about you that we may not know??
When I’m not scrapping, I am an avid reader of mystery stories.

Friday, November 14, 2008

Step by Step LO Instructions

Materials needed:
1 5x7 photo
1 piece of cardstock for matting
2 piece of cardstock for border edges
3 pieces of patterned paper
2 alphas for mix and match
Misc stamps
Pen for edges
Circle cutters or bowls for tracing

Instructions:
Use one sheet of pattern paper for your base. Cut one 6.5 inch circle from one patterned paper and another 5 inch circle from the other. Adhere those as shown in example. Mat the photo on cardstock and adhere as shown. Using the other cardstock you can cut the borders by hand if you like. I used precut bazzill edges but they won’t be hard to do on your own. Then using your pen, draw stitch lines on each border. Adhere those. If you have a stamp you like, stamp 3 images as shown. Then mix and match your title and you are done. The open space in the circle is the perfect place to put some journaling.